
After giving the Badger2040 CO2 monitor to my parents I decided to build one for myself. An enhancement I wanted this time around was to be able to save data with the location attached. This meant buying a CPU with Bluetooth, and writing an iOS app to get the location data from my phone.
Hardware
I ended up with this setup for $162.50:
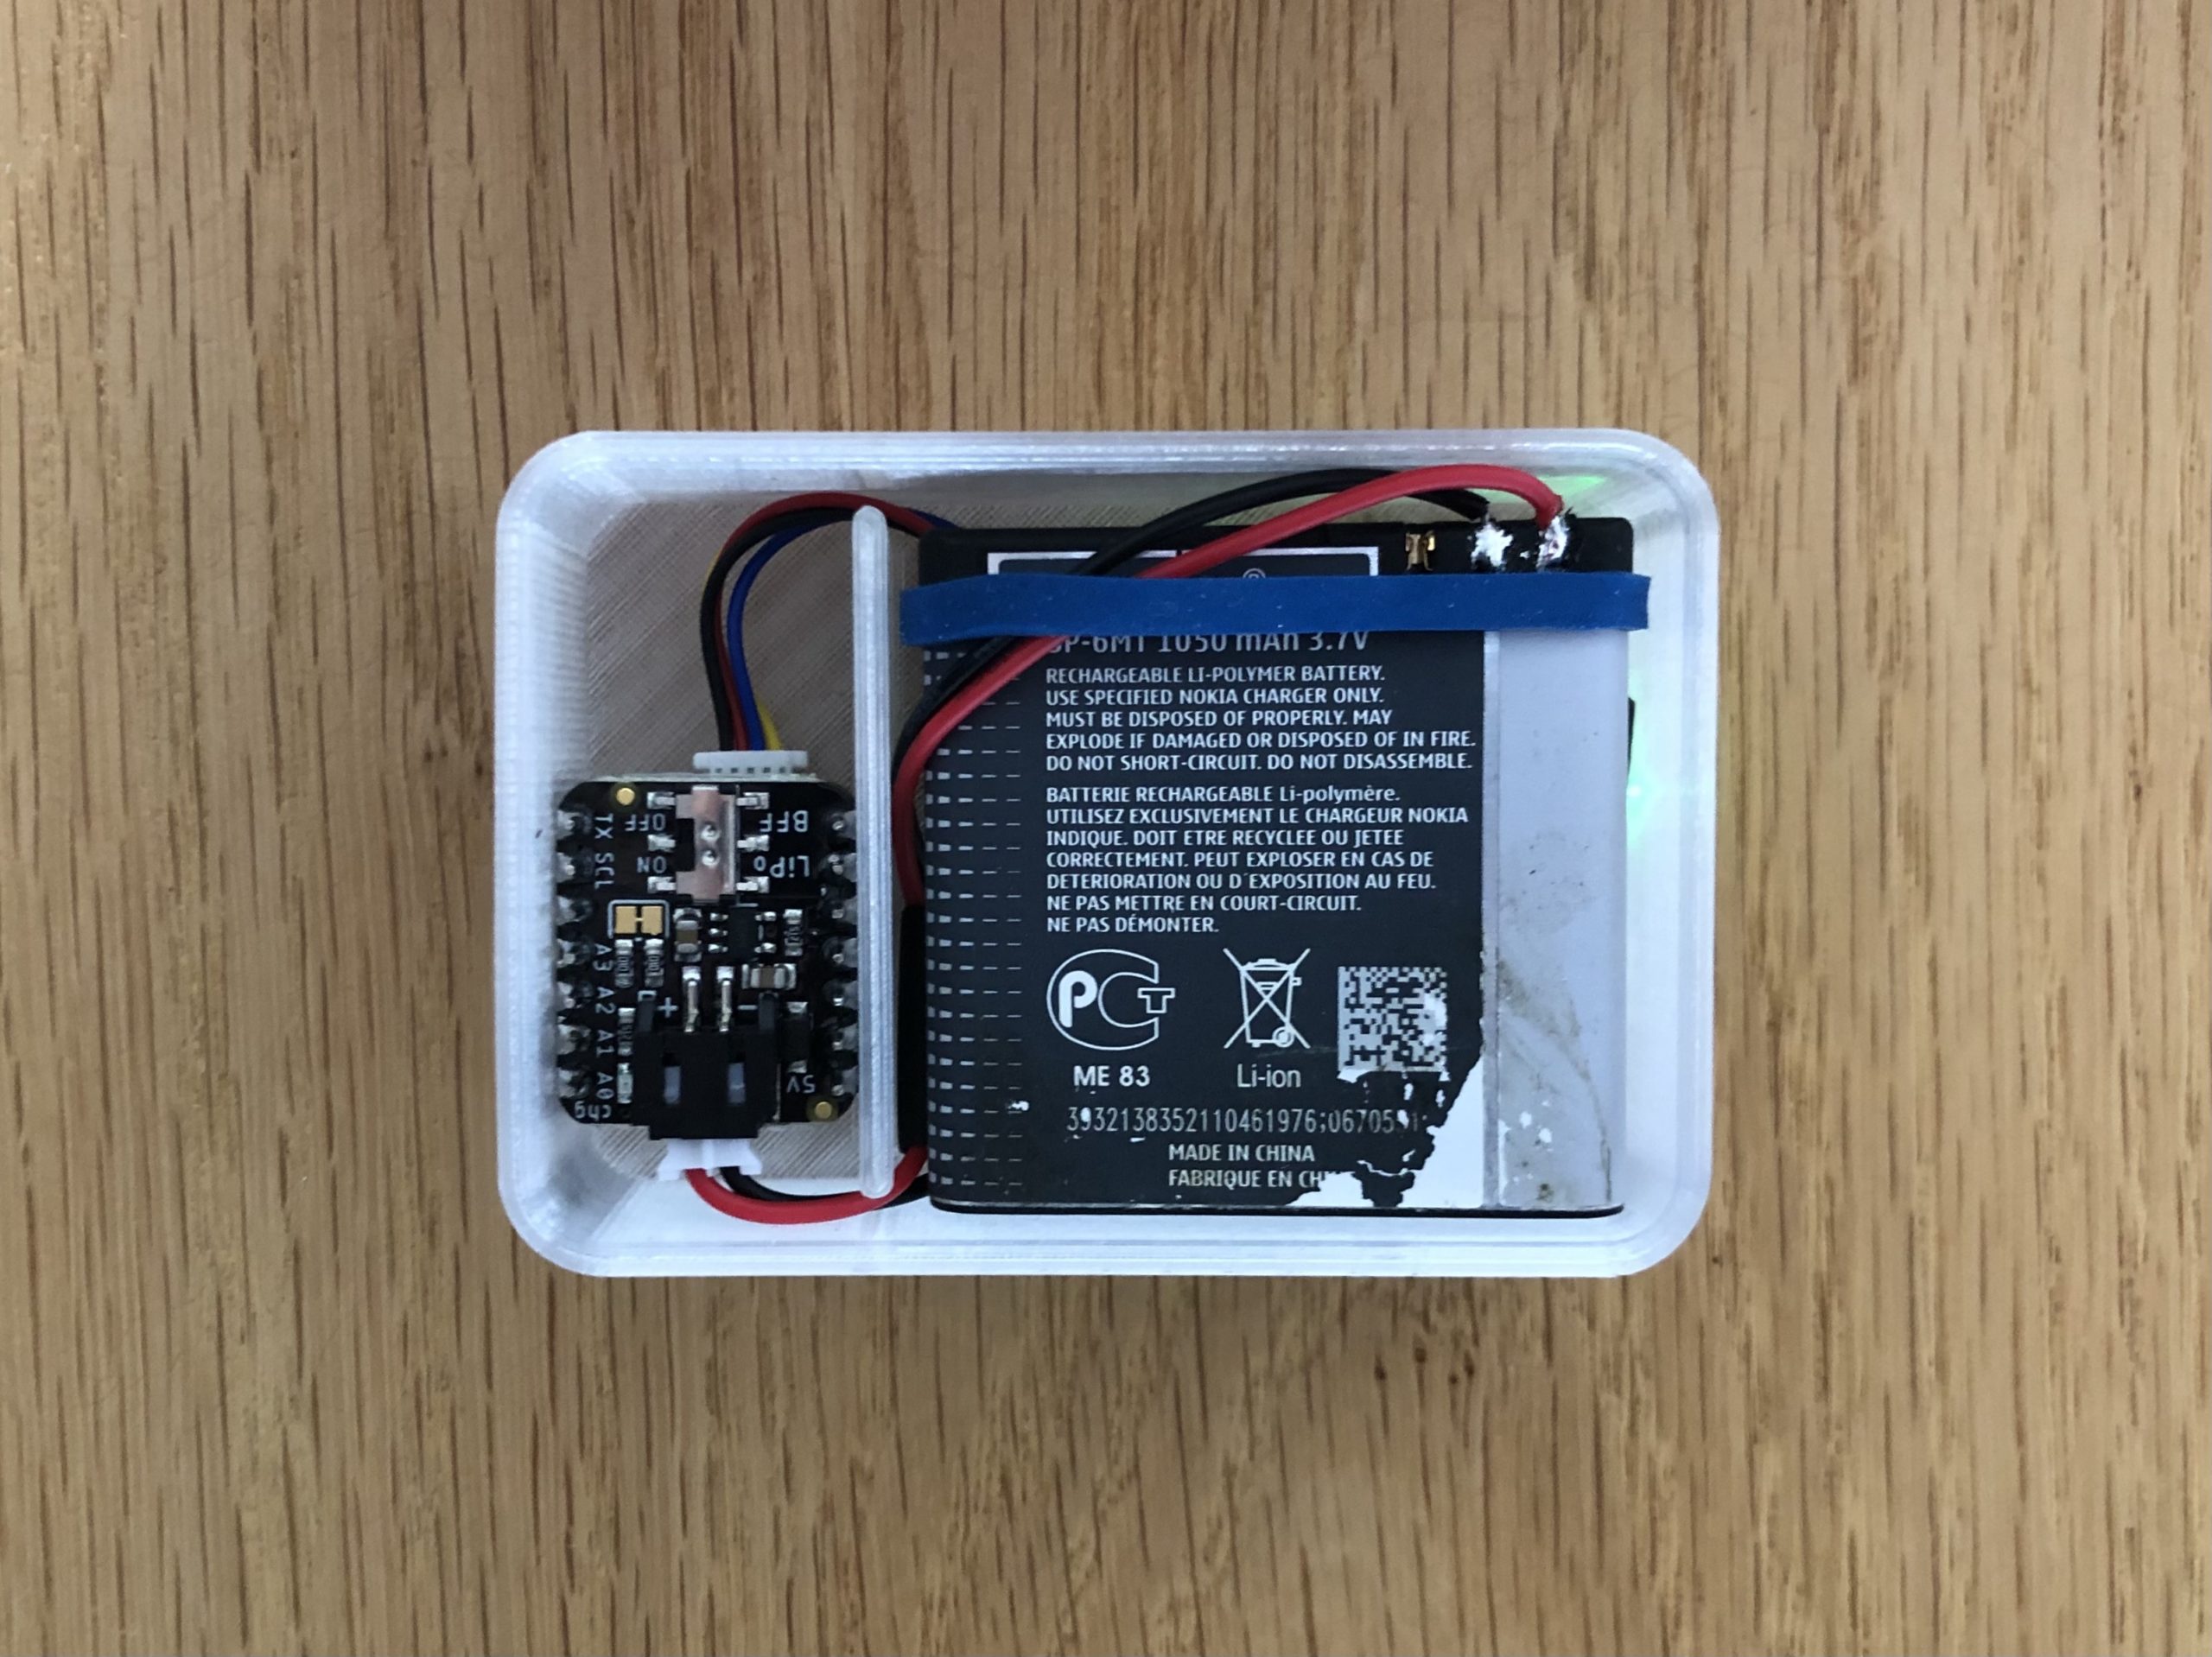
- Adafruit SCD-41 CO2 sensor
- Adafruit ESP32-C3 QT Py dev board
- Adafruit battery charger for QT Py
- Adafruit Qwiic cable
- Recycled Nokia BP-6MT 3.7V battery
Software
Bluetooth sensor
I wanted to keep the Bluetooth ESP32 sensor code the same as the Sensirion BLE gadget sample code, so that my iOS app would be compatible with all Sensirion sensors.
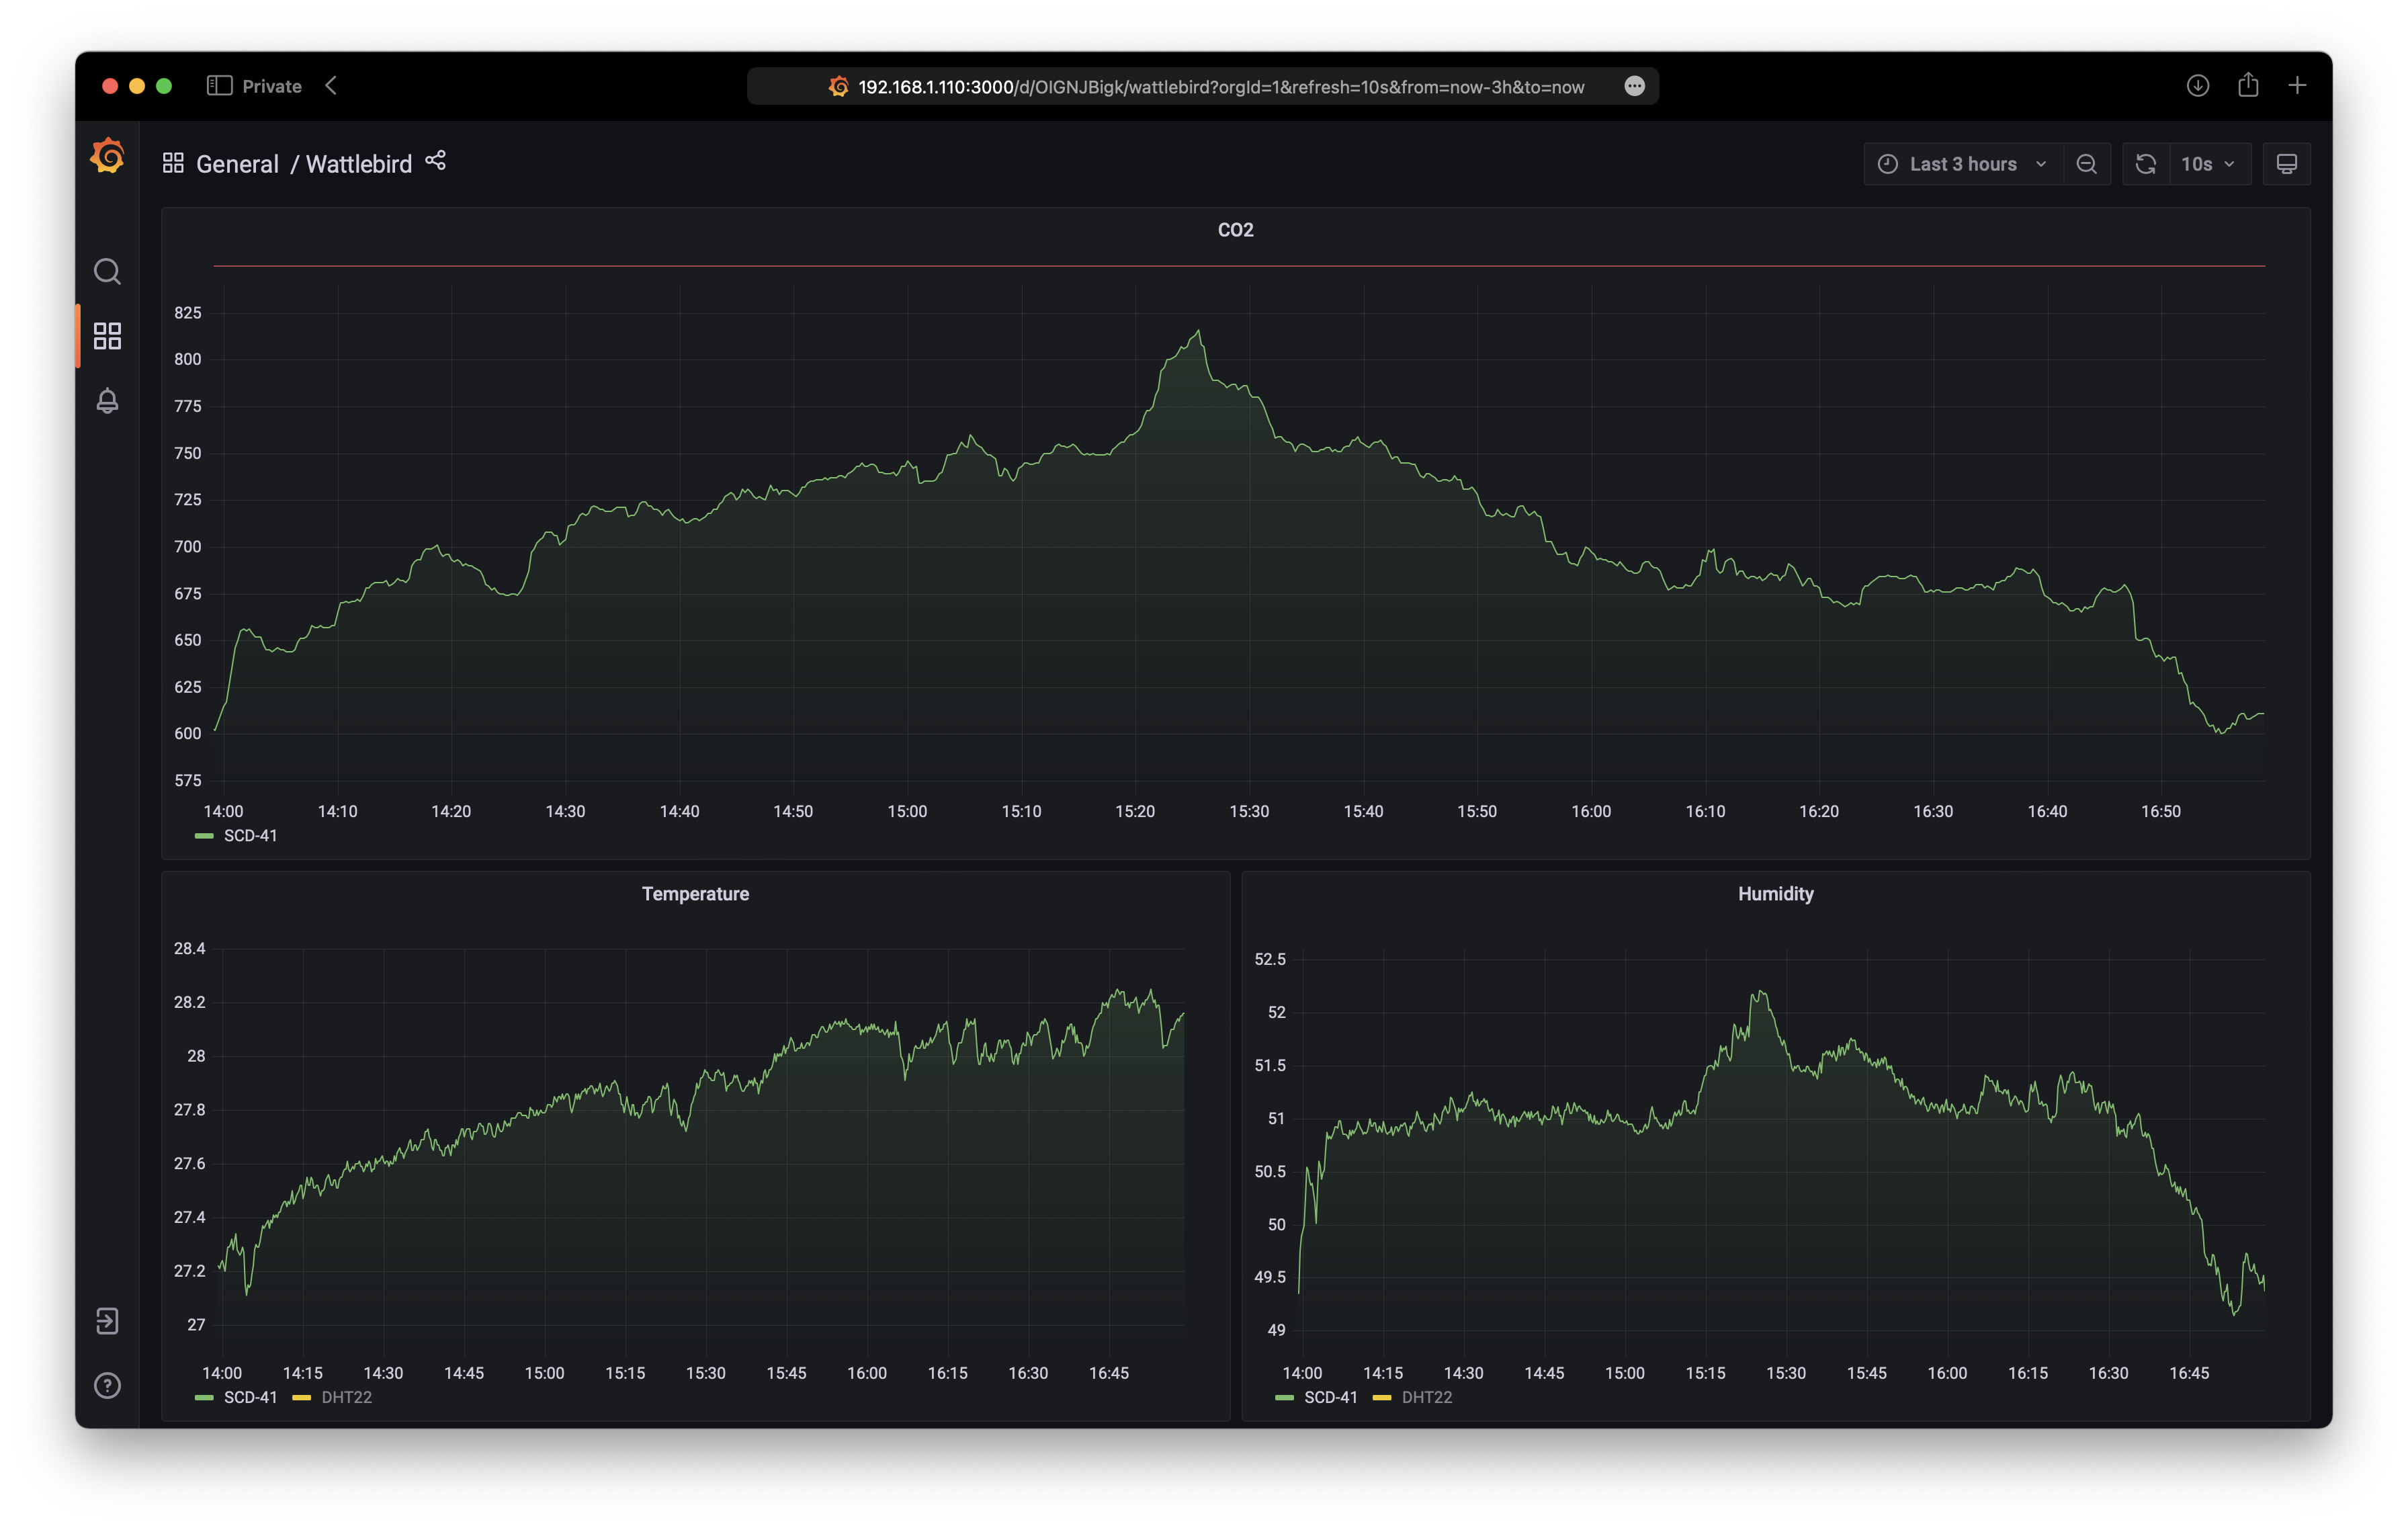
But I also wanted the device to connect to my WiFi when I was home so that I could measure the CO2 over time via Prometheus/Grafana, and also have Apple HomeKit connect to it so that I could ask Siri for the current levels.
Find the code here: add/4-adafruit-qt-py-esp32-c3
And the HomeKit accessory code here: homekit-scd4x

iOS/macOS app
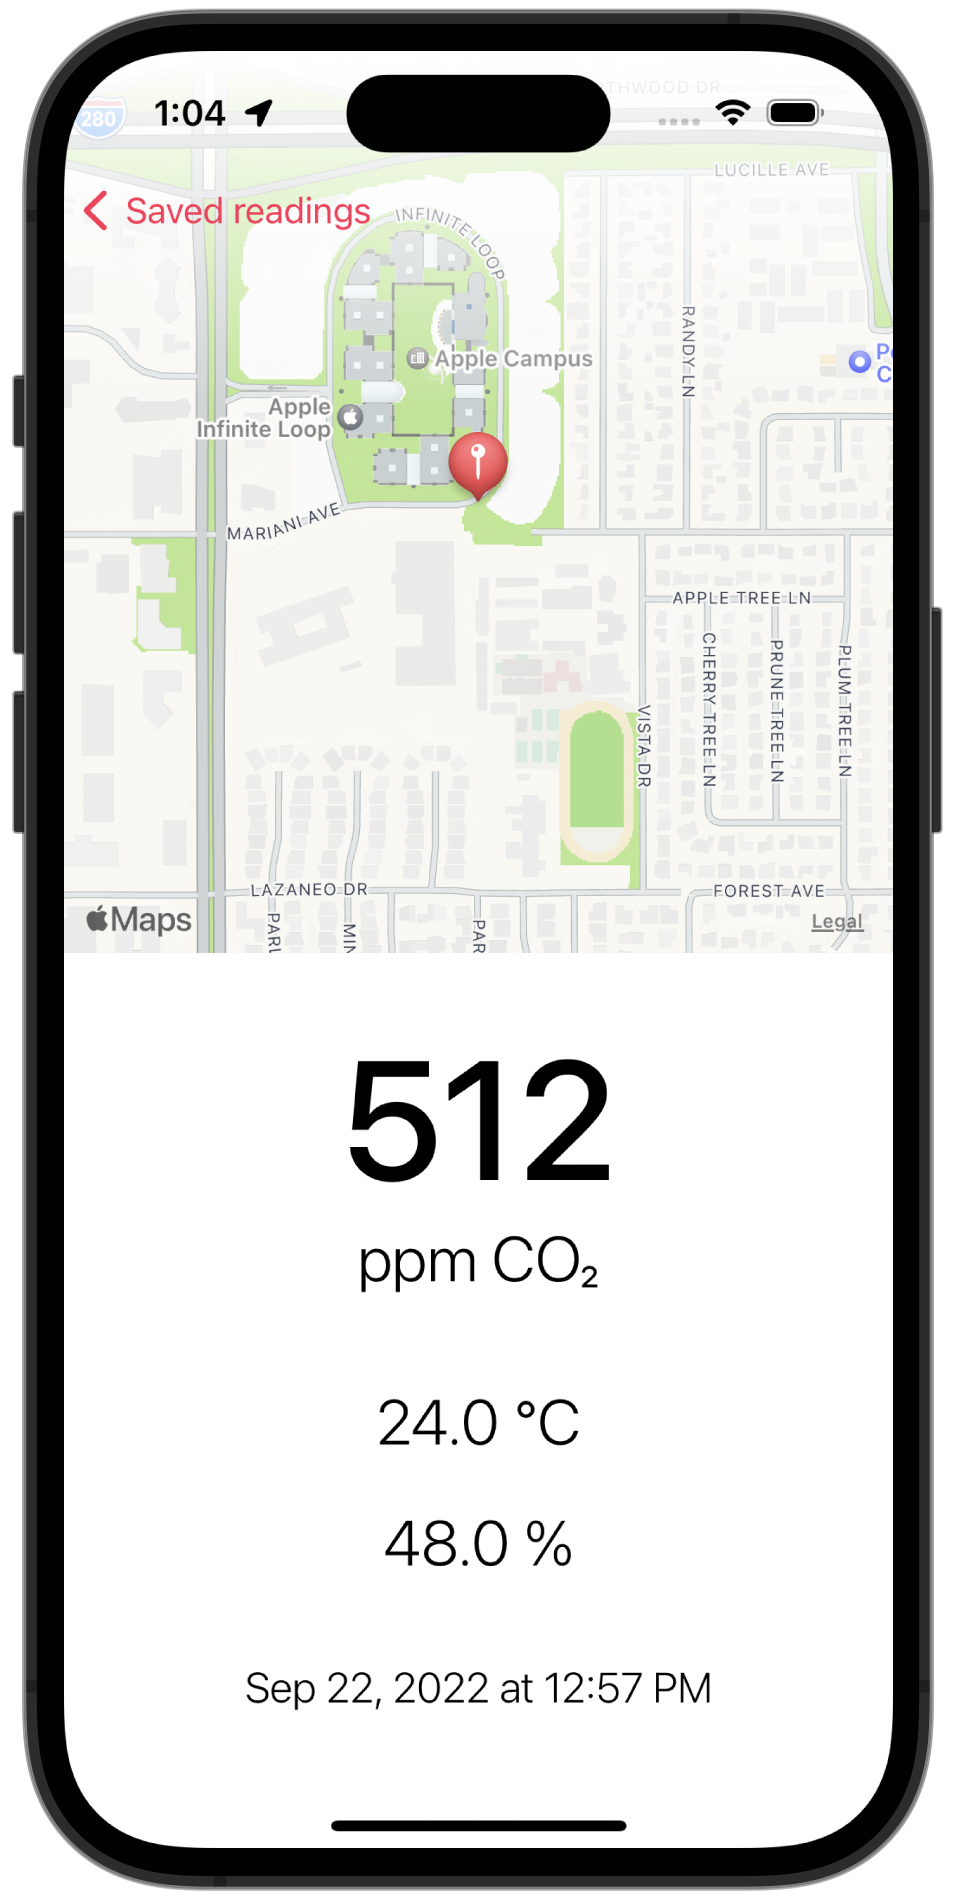
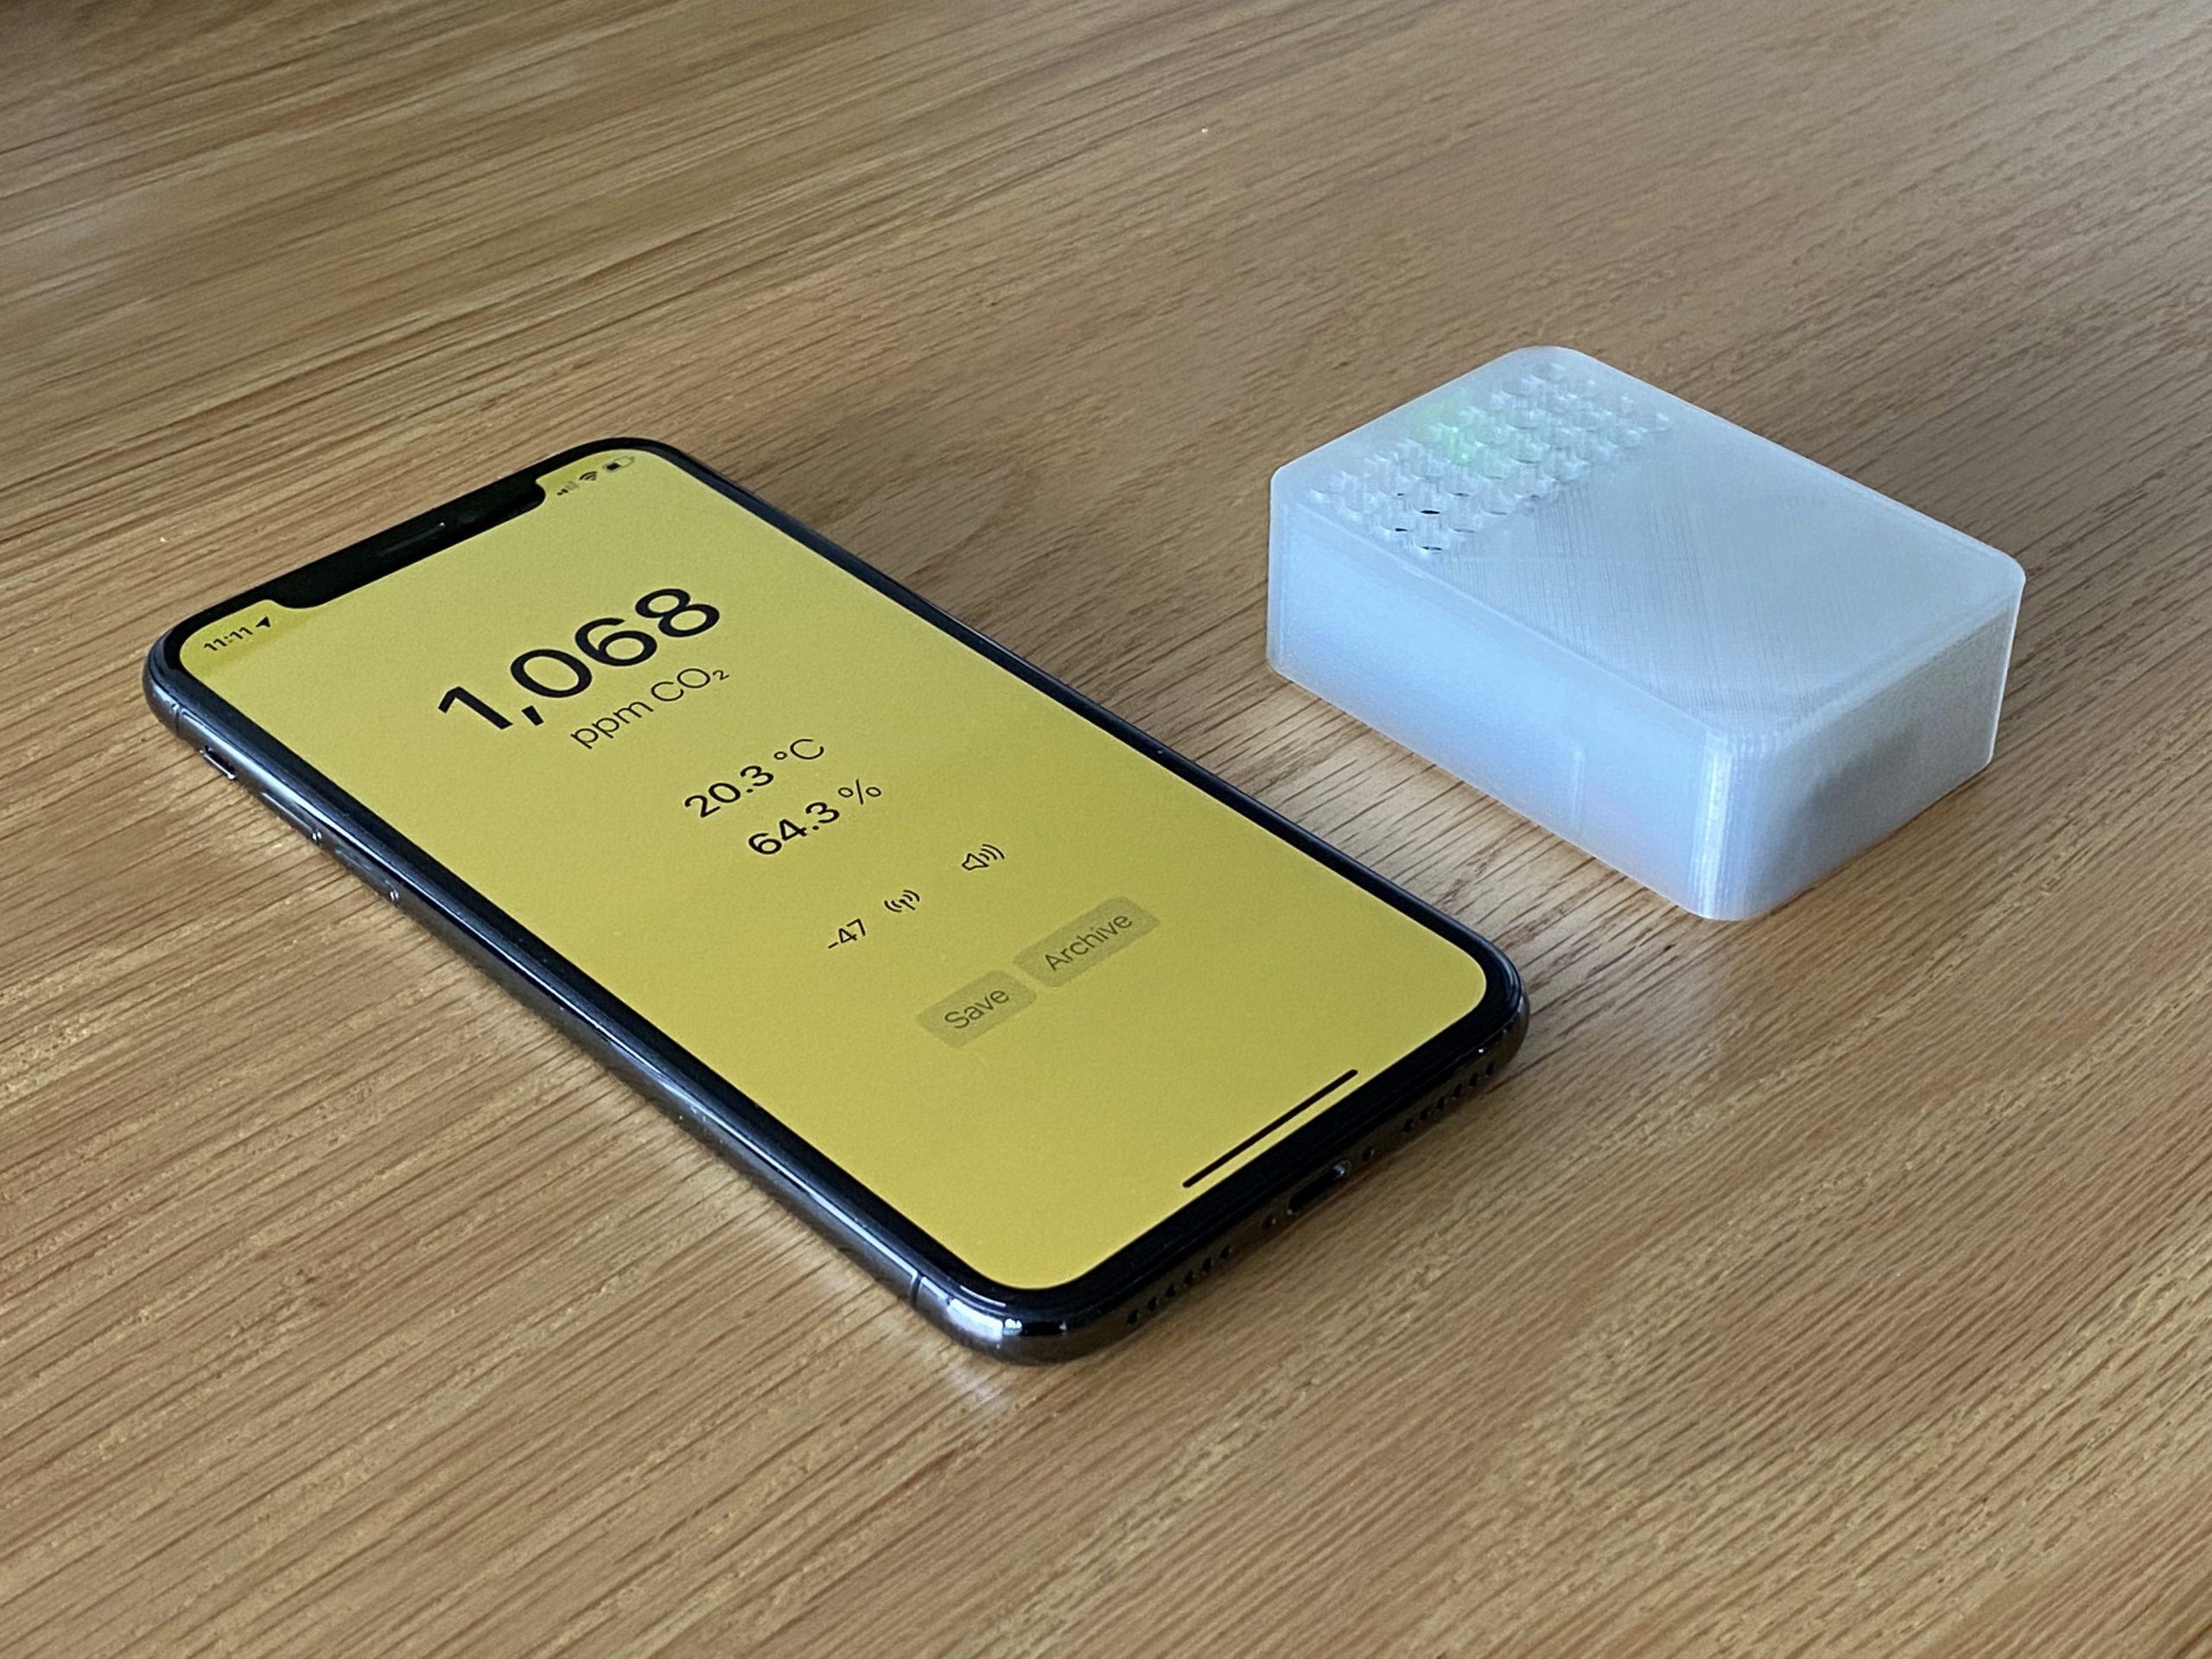
Prototyping in SwiftUI is a really great experience, so it wasn’t long before I had CO2 readings showing up in my app. Next I added location data to the readings, and saved those in Core Data so they could be synced across Apple devices via iCloud.
I noticed myself staring at the screen a lot as the as the data streamed in, and wondered if I could avoid having to look while understanding the data. This led me to add sound and haptic feedback.
When sound is turned on, the app now plays two notes. The first is middle-C to signify what 1,000 ppm (parts per million) sounds like, and the second is the note corresponding to the current reading. This makes it easy to know if the reading is higher or lower than 1,000 ppm.
The app also vibrates corresponding to the current reading – softly for under 850 ppm (safe levels), harder for over 1,000 ppm, and four vibrations in a row for over 2,000 ppm.
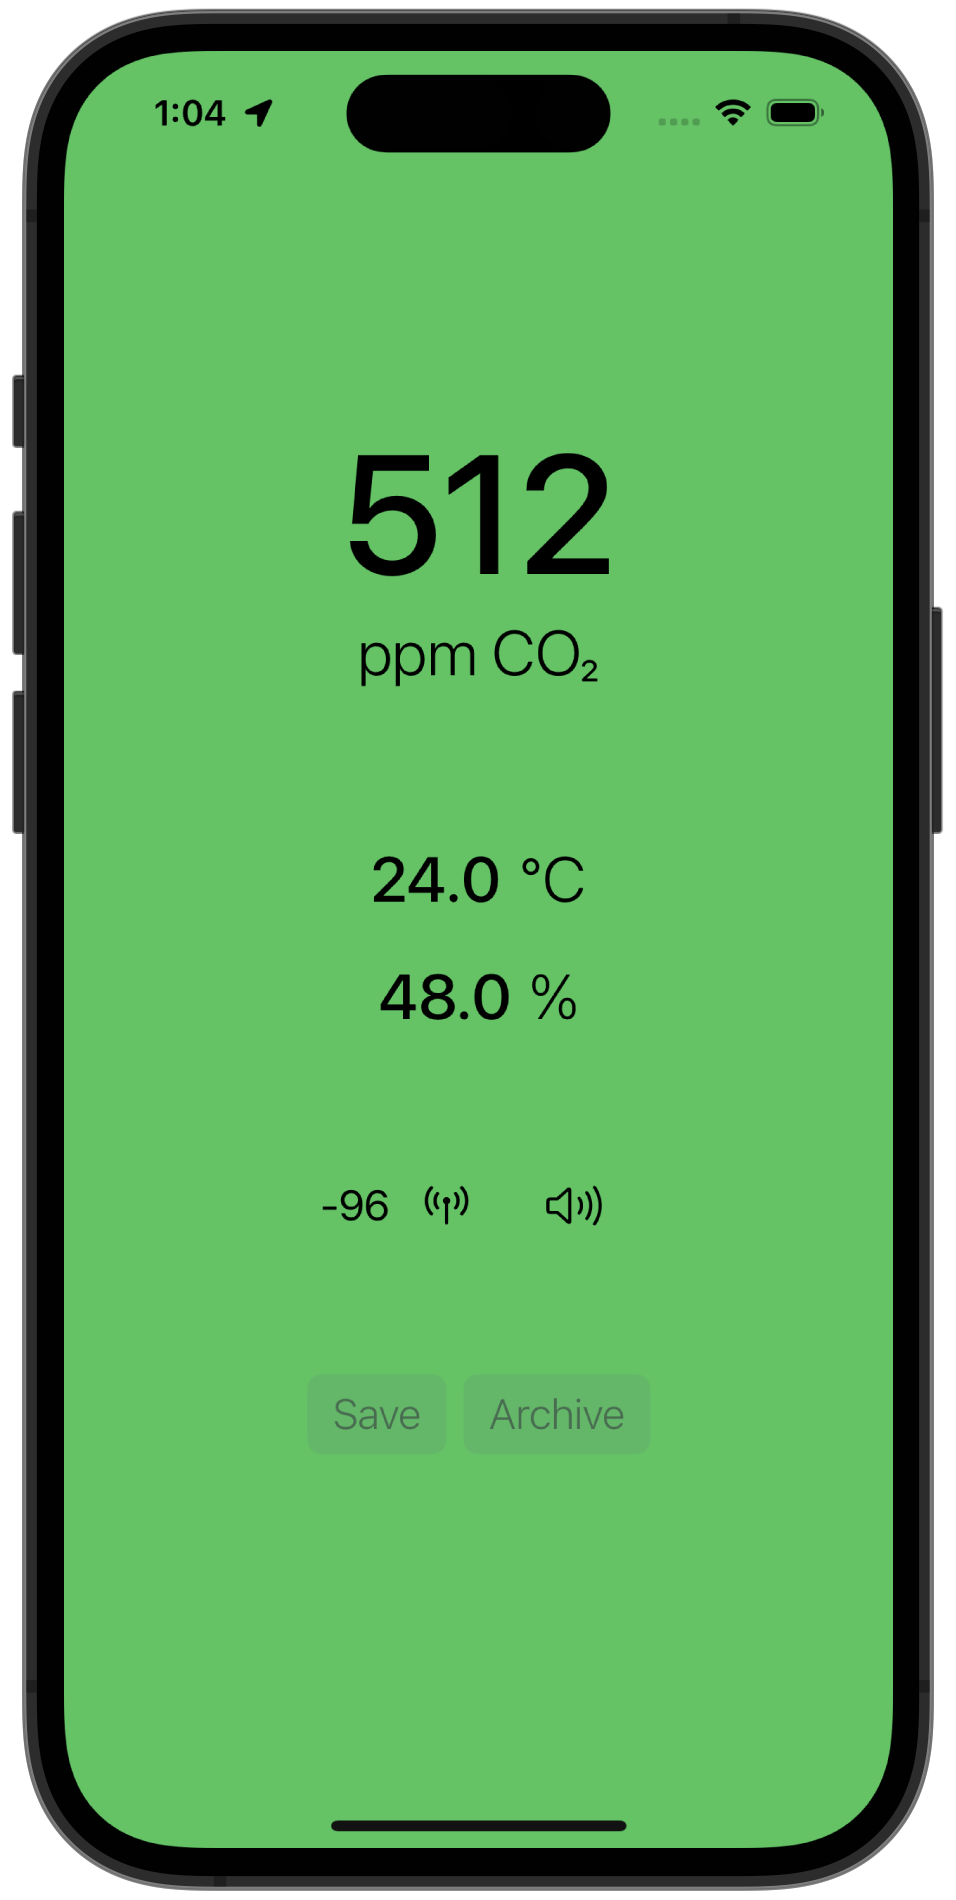
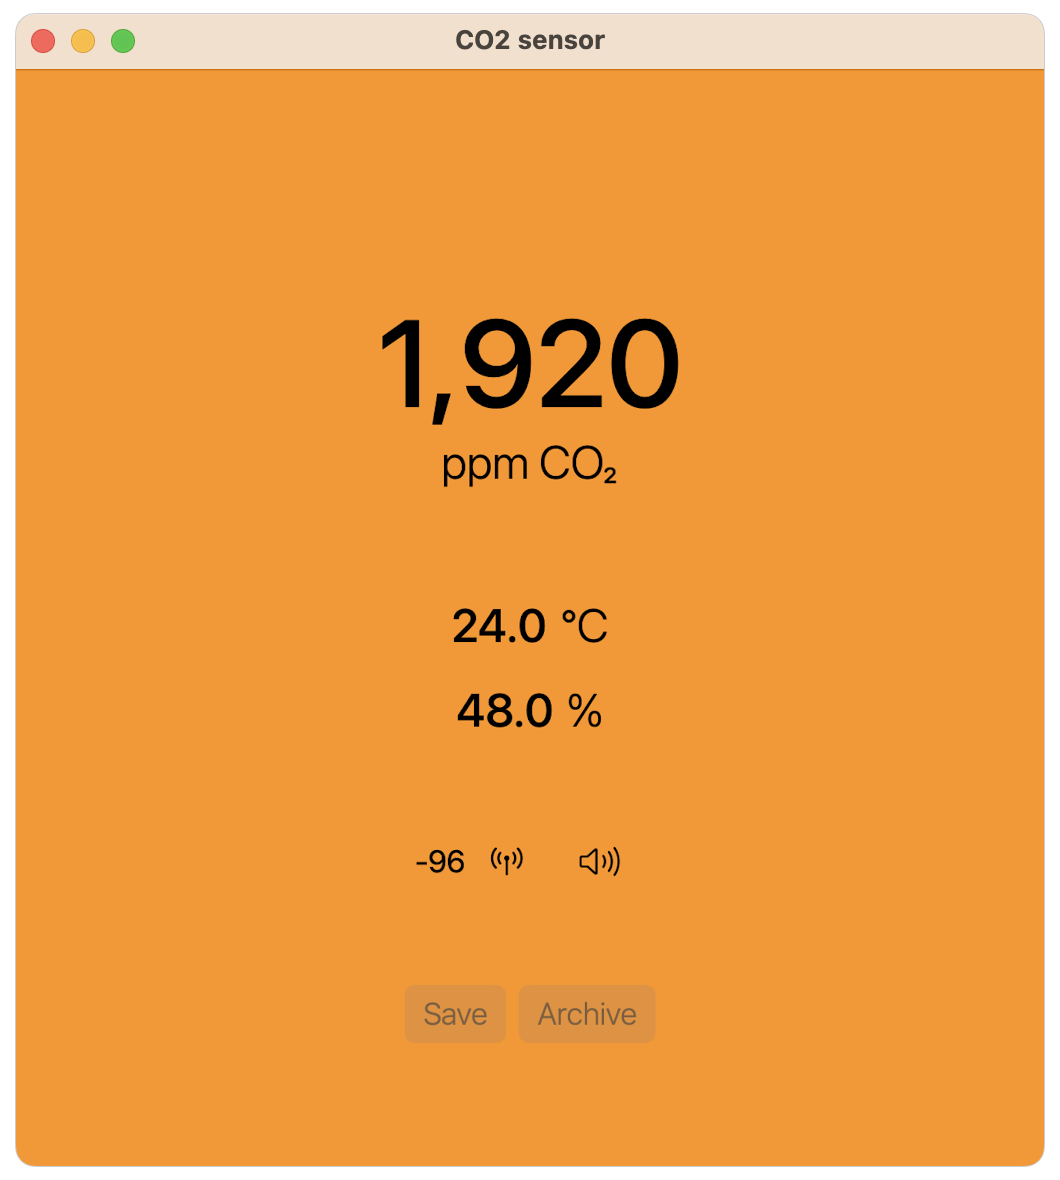
As well as light and dark mode, I also added the ability for the screen to be coloured. Green for under 850 ppm, yellow under 1,500 ppm, orange under 2,000 ppm, and red for readings above that.
Find the code here: ios-ble-co2-sensor


Xcode lets any SwiftUI iOS app become a macOS app with the click of a button. I was sceptical whether Bluetooth would still work, but to my amazement it all Just Worked™️.


A case for the sensor
The next step was to design a 3D printable case for the sensors. I started drawing the sizes of each component in 2D using InDesign to give me an easy way of dragging around components for the smallest footprint.
The first dream I had was of a round case, but I wasn’t sure about size so I designed a compact version as well.

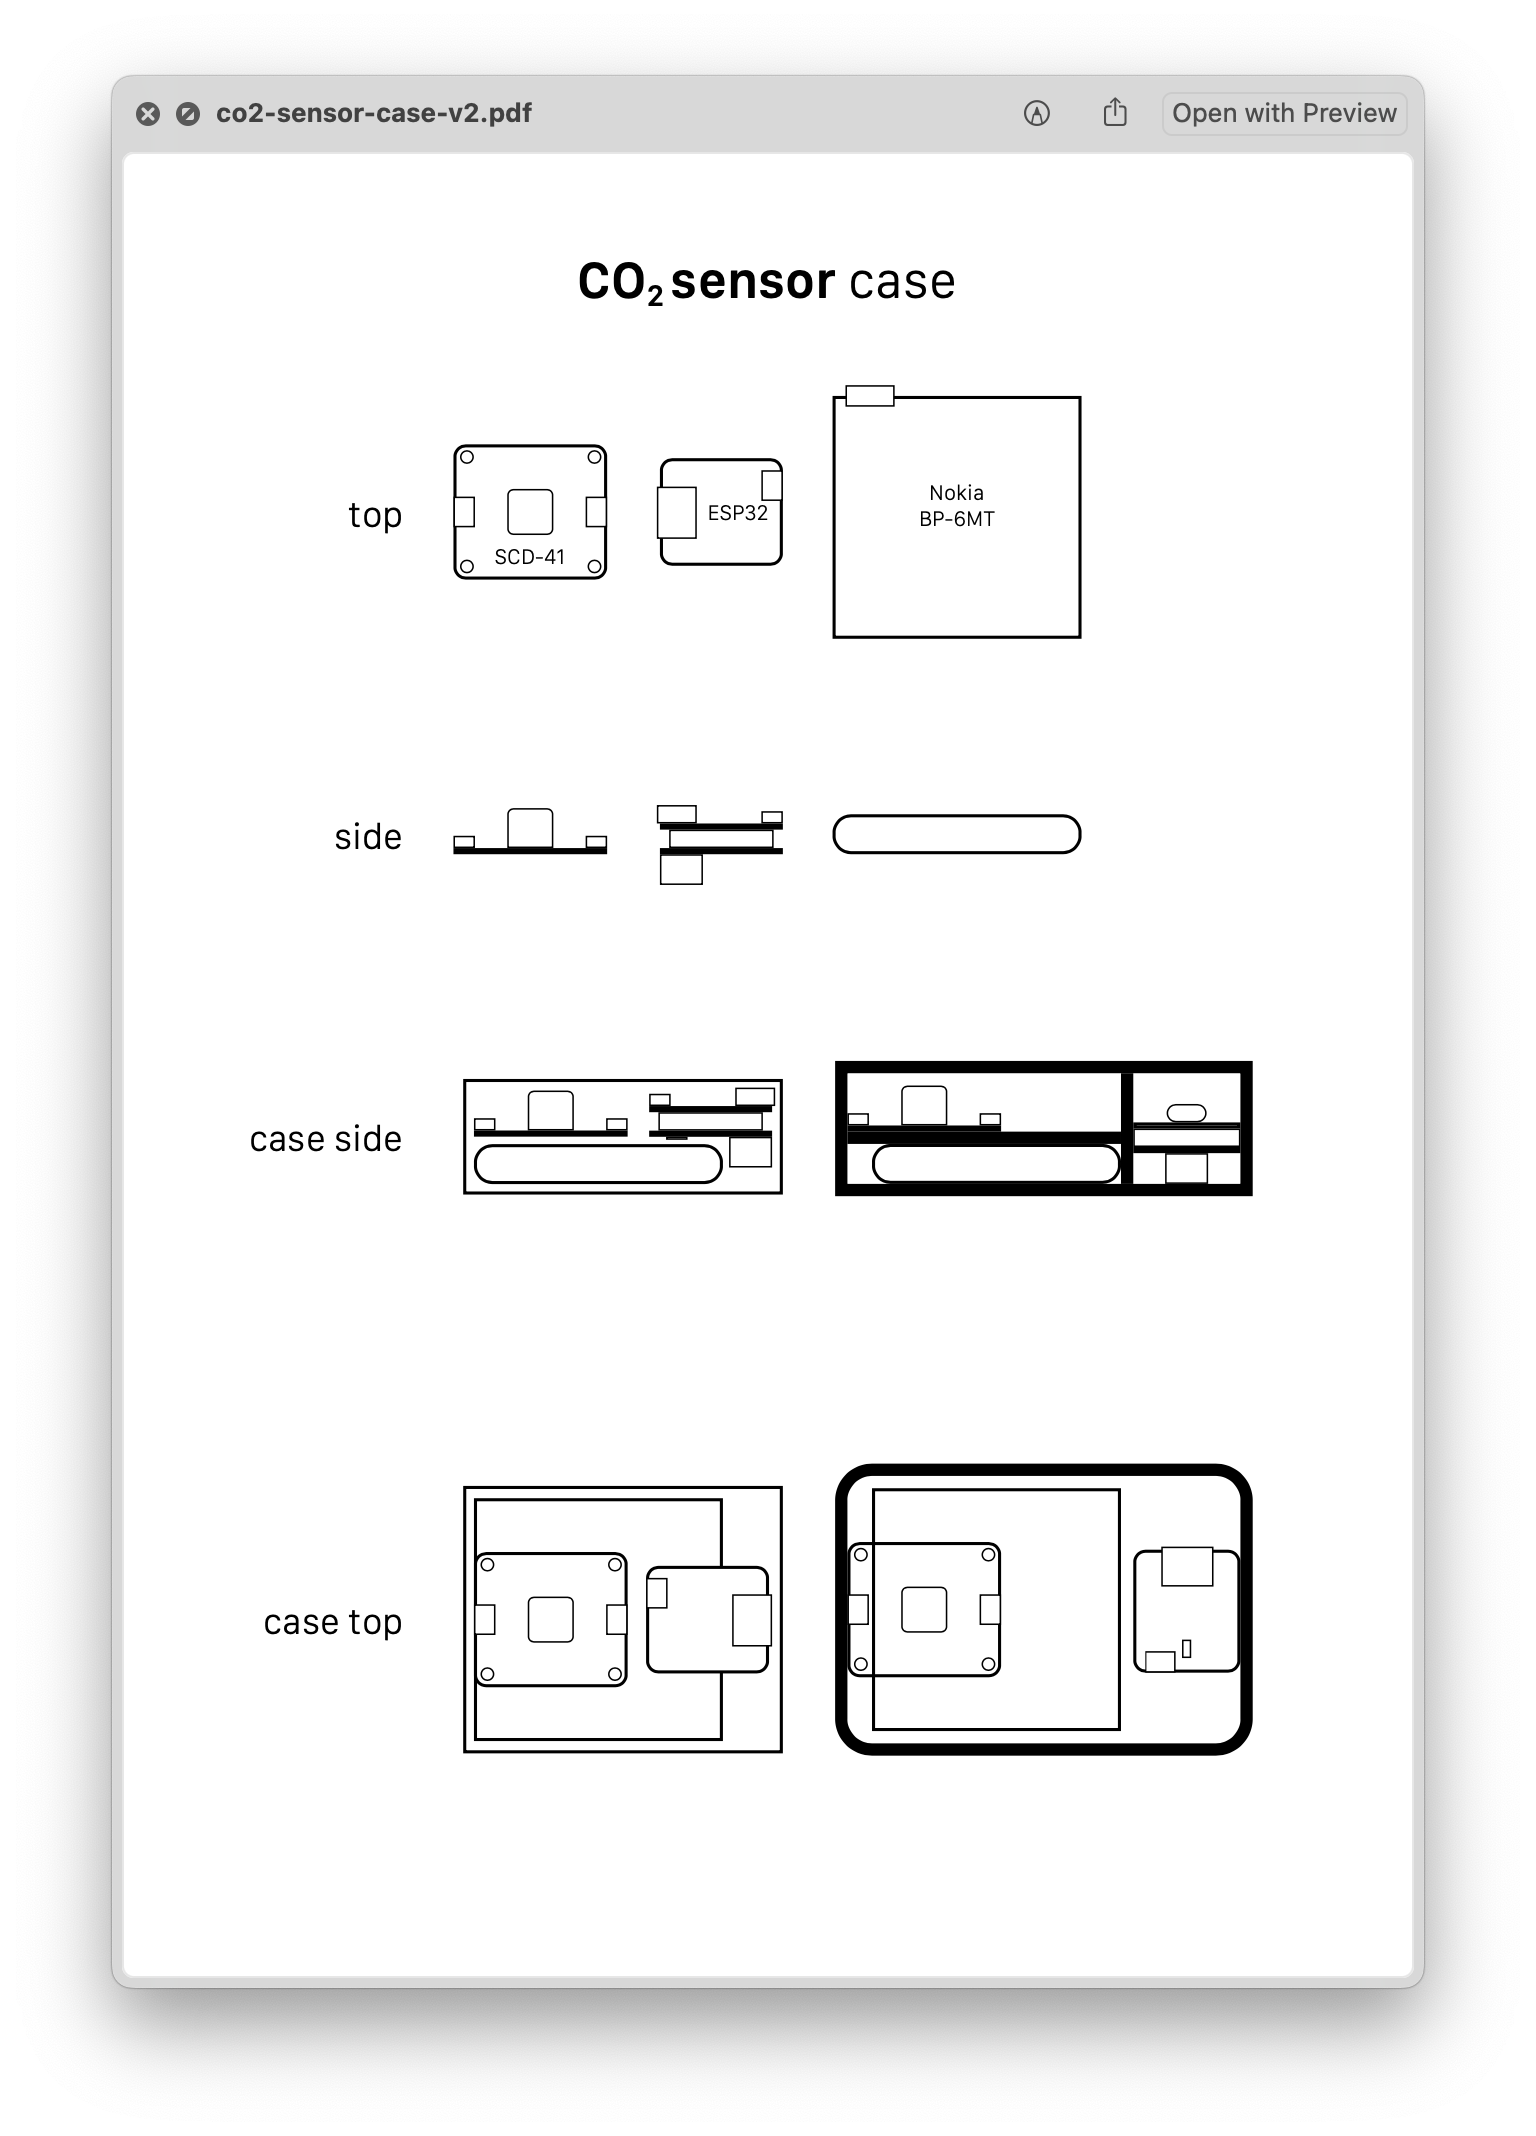
After a few hours in FreeCAD both versions came together quite quickly.
Find the code here: co2-sensor-case


After seeing them both in 3D I decided on the more compact design and sent it off to Kad3D to be printed. A week later it arrived!


Performance and ethics
I’m really happy with version one of the sensor and app. I currently have the CO2 sensor reading and advertising its data every 5 seconds over Bluetooth and WiFi. With the radios both set to full power, my 13 year old Nokia battery lasts for ~8 hours before needing a charge via USB-C.
This is fine for now, but I might work on two-way Bluetooth communication so that I can reduce the radio power and increase the time between readings for longer battery life.
Another thing to consider is the ethics of saving and sharing CO2 readings. Should I share the open data for the safety of the public? Or should I disclose my findings to the owners first, recommending changes before publishing the data publicly?
Perhaps a Tweet-bot with a 14 day disclosure delay timer is in order.
In the meantime, Siri has the best advice – clear the air with ventilation.